The operation is also an effective troubleshooting fix for Windows Update installation issues. This tutorial covers different methods to delete old Windows Update files on Windows 11 and Windows 10 computers.
Is It Safe to Delete Windows Update Files?
Removing old Windows Updates files won’t cause any harm to your computer software or hardware components. Personal files aren’t deleted, either. It’s a safe process. The only downside is that you may not be able to reverse or restore previous versions of Windows to your computer. A good rule of thumb is to delete Windows Update files only when:
Storage space is low.Your PC fails to install Windows Updates.
How to Delete Old Windows Update Files
There are multiple ways to remove Windows Updates files on Windows computers. You can use built-in tools like Disk Cleanup and Command Prompt to get the job done. Likewise, you can also manually locate and delete temporary Windows Updates files. We highlight four ways to get rid of Window Update files below. The steps may vary depending on your PC’s operating system version.
Delete Windows Update Files from Window Settings
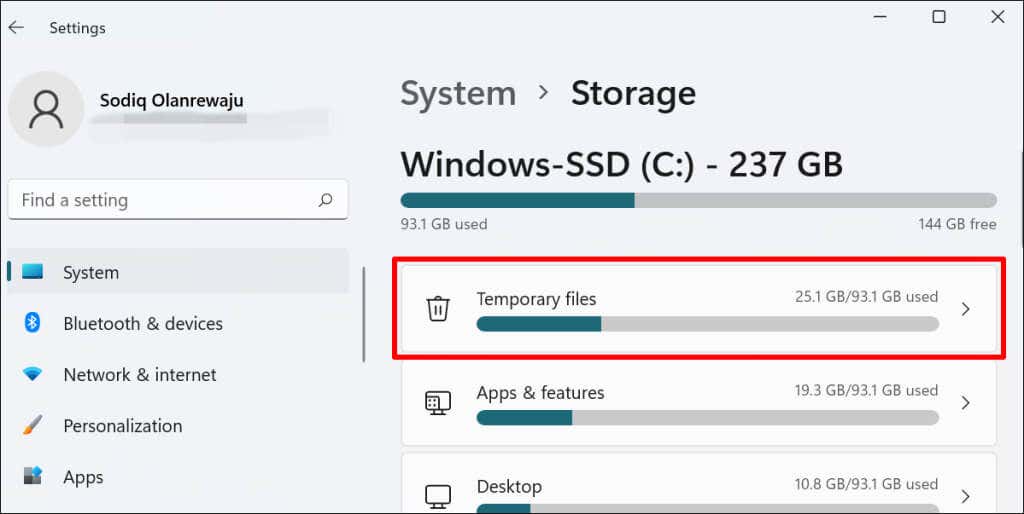
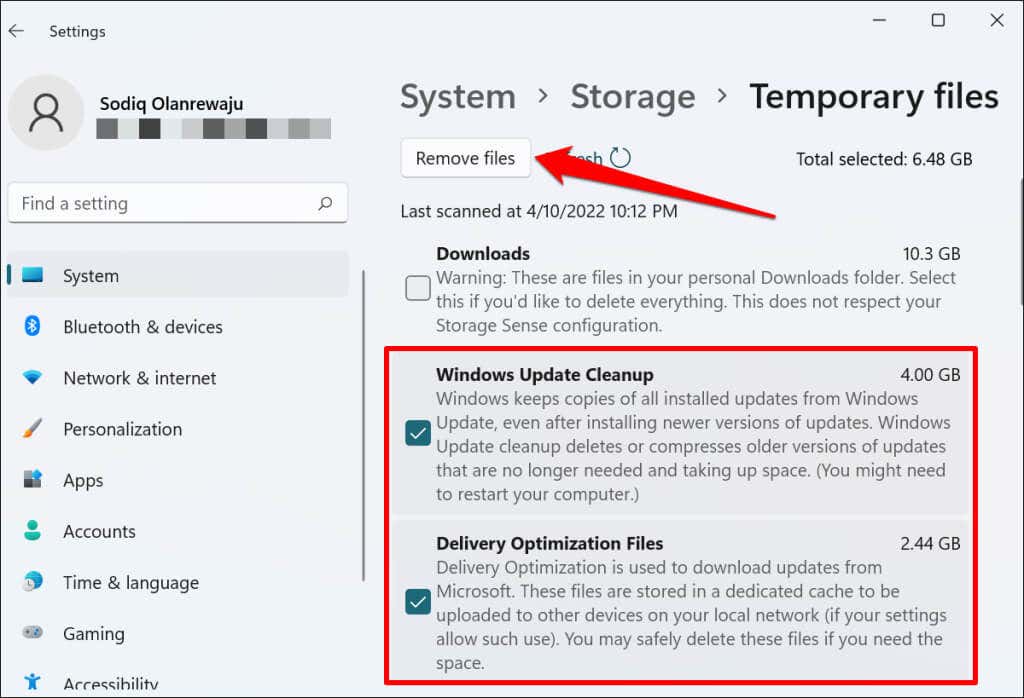
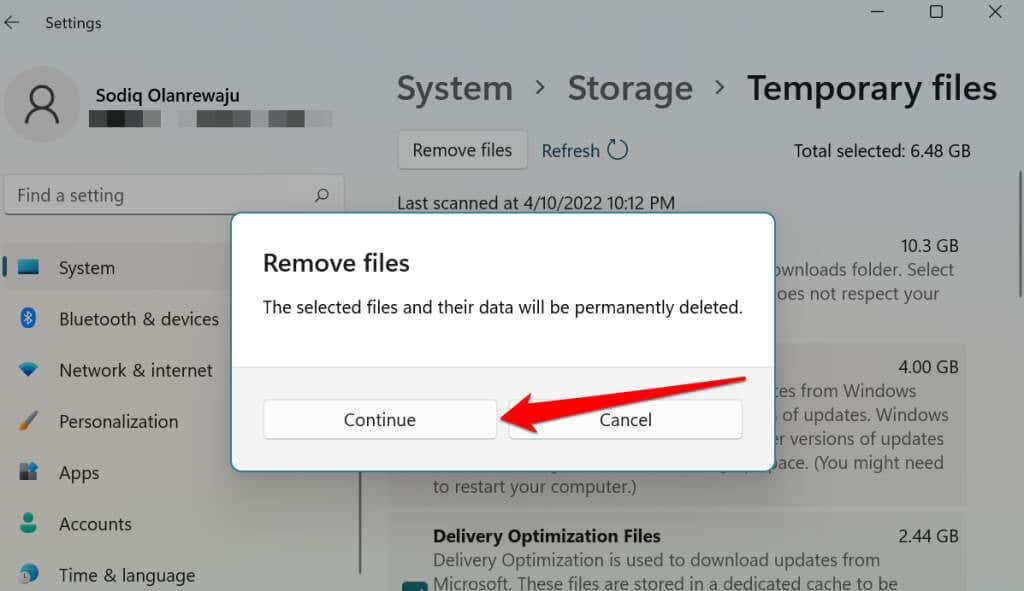
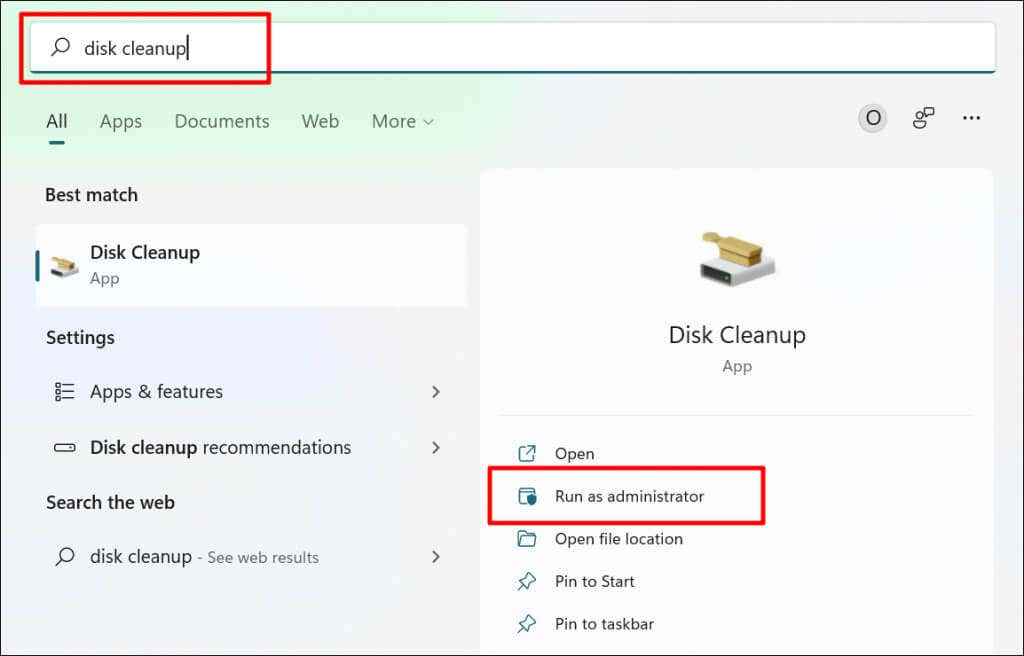
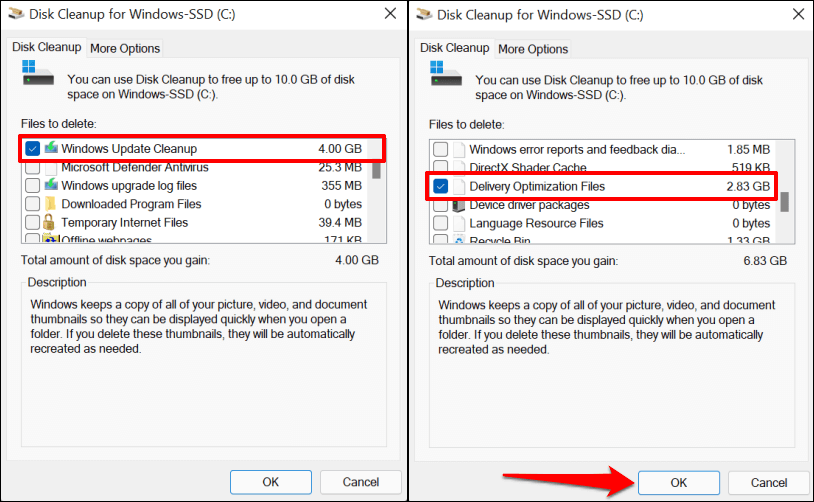
Windows 11 and Windows 10 computers have a “Windows Update Cleanup” tool in the Settings menu. Follow the steps below to use the tool to delete old Windows Update files. “Delivery Optimization Files” are associated with Windows Updates. The files allow your computer to exchange Windows Updates information with devices on your local network. Although Windows automatically deletes Delivery Optimization files after a short period, manually removing them from your computer is safe. Microsoft recommends deleting the files to create free space on your hard drive. Note: For Windows 10, go to Settings > System > Storage > This PC > Temporary files > Previous version of Windows, and select Remove files.
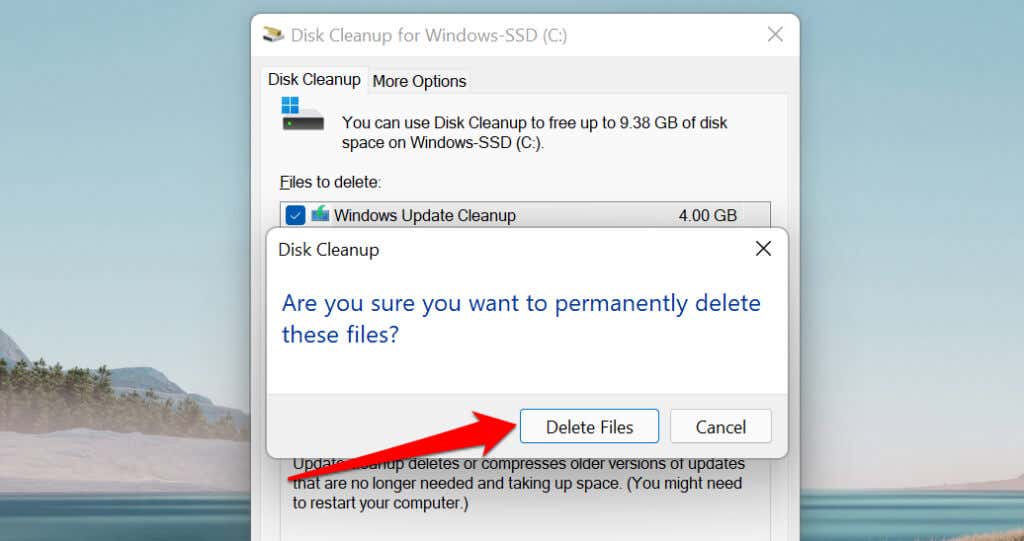
Delete Windows Updates Files Using Disk Cleanup
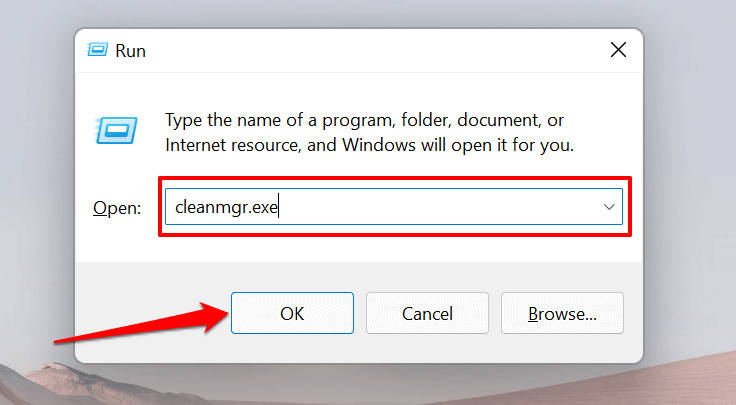
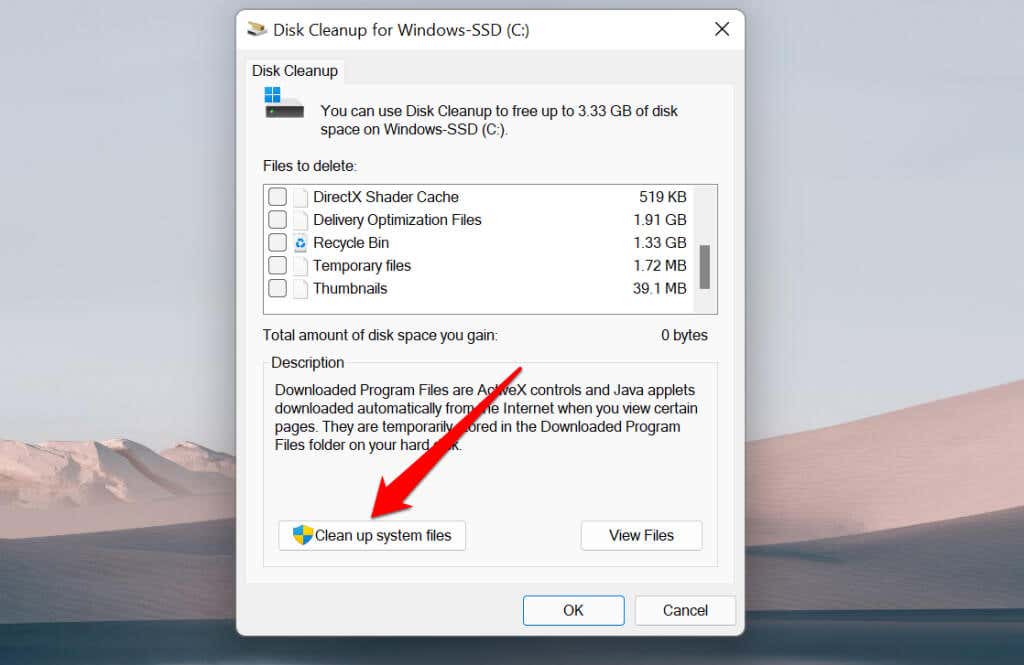
Disk Cleanup is a built-in app for freeing disk space on Windows devices. It’s a compilation of unique tools for removing different file types eating up your PC’s storage space. You can use Disk Cleanup to delete temporary app files, empty your PC’s Recycle Bin, redundant internet files, etc. Follow the steps below to use the Disk Cleanup app: Alternatively, open the Windows Run box (press Windows key + R), type or paste cleanmgr.exe in the dialog box, and select OK. If you don’t see the “Windows Update Cleanup” option, you didn’t open Disk Cleanup with administrative privileges. Tap the Clean up system files button to unlock all Disk Cleanup features. The Windows Update Cleanup option should appear in the Disk Cleanup app in a few seconds.
Manually Delete Windows Update Files
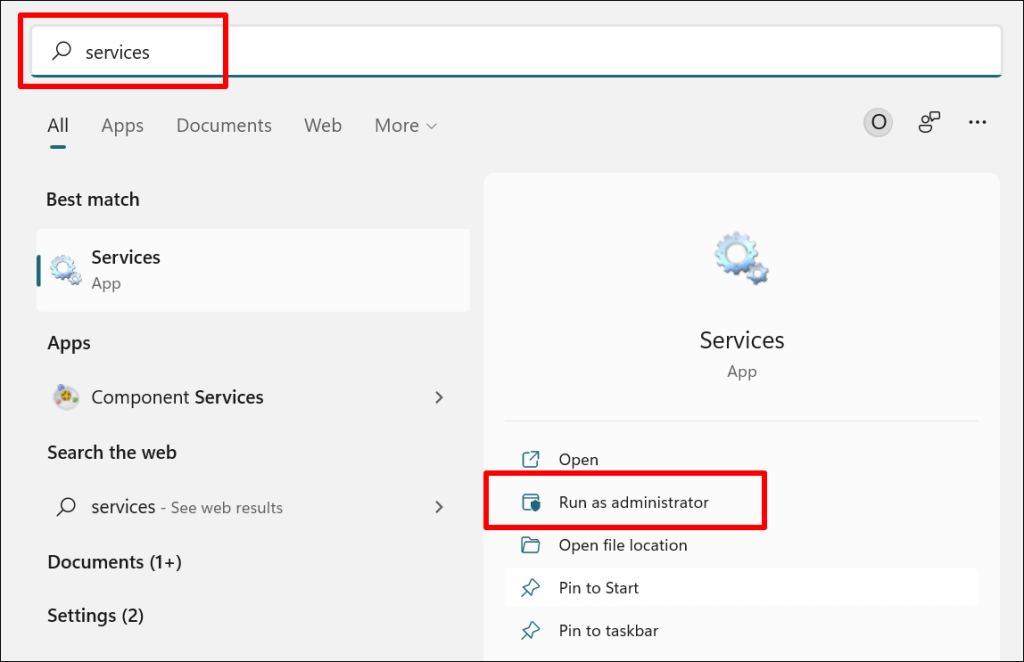
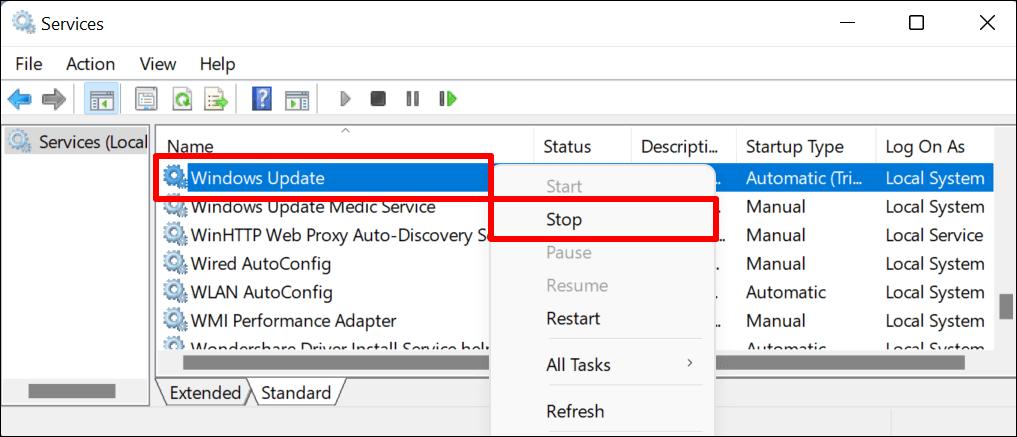
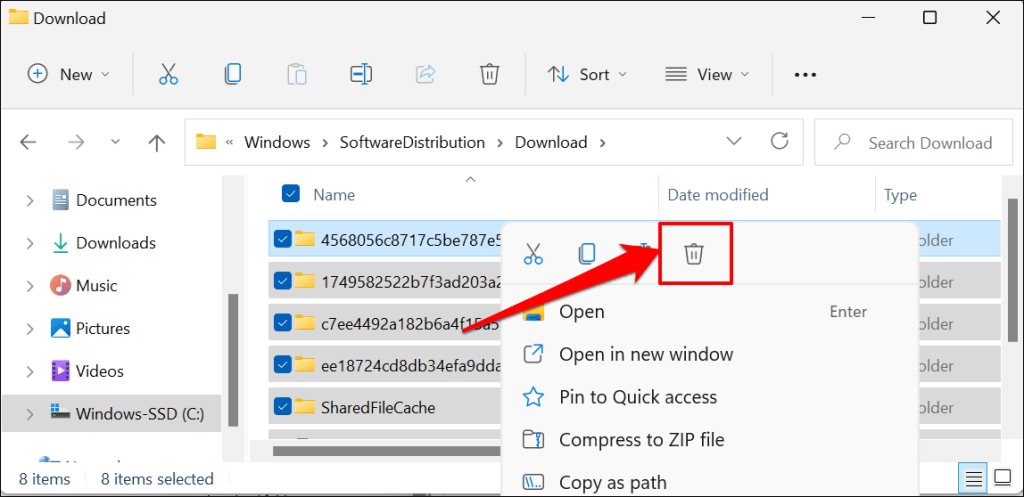
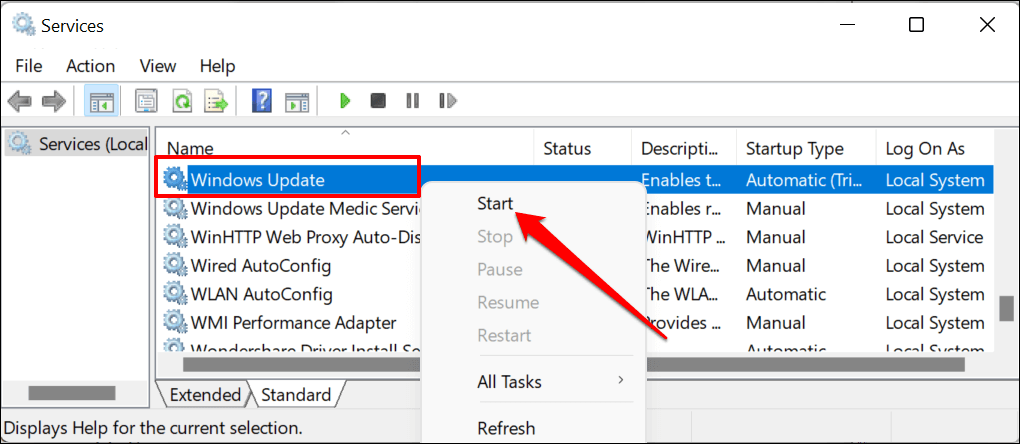
First, you need to stop the Windows Update service—the background service that detects, downloads, and installs updates for Windows and other programs. That’ll open the SoftwareDistribution folder—where Windows stores temporary installation files needed to update your computer’s operating system. Deleting or moving contents of the folder can also fix Windows Update issues. You can move the files to an external storage device if you don’t want to delete them. The final step is restarting the Windows Update service. If a new Windows Update is available for your computer, Windows will download new files to the Software Distribution folder. The Windows Update temporary files are often large. If your PC is low on storage space, empty the folder after every Windows Update installation.
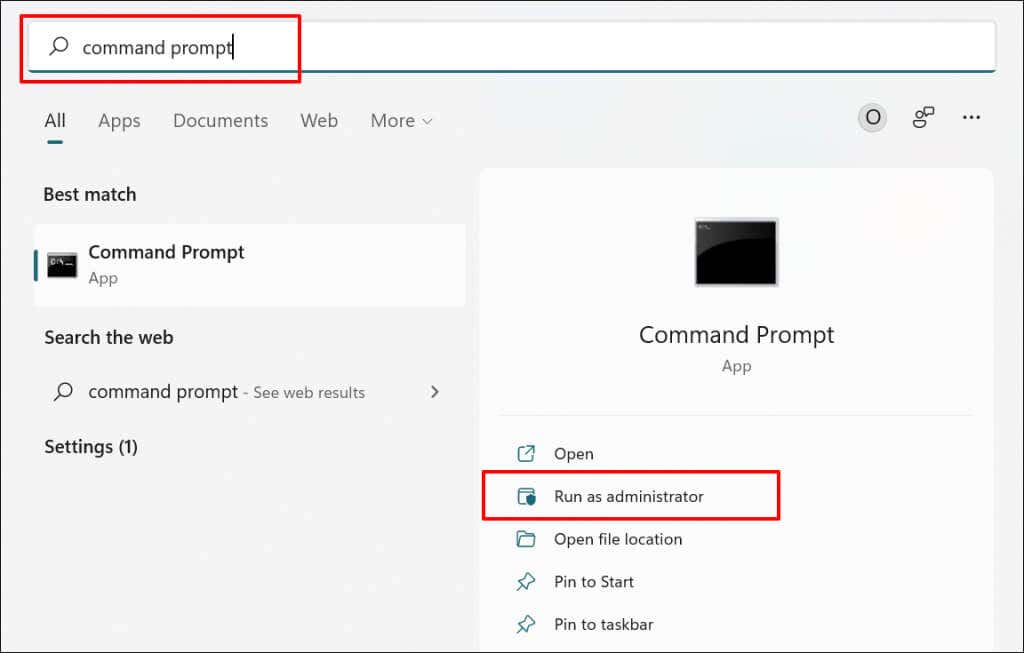
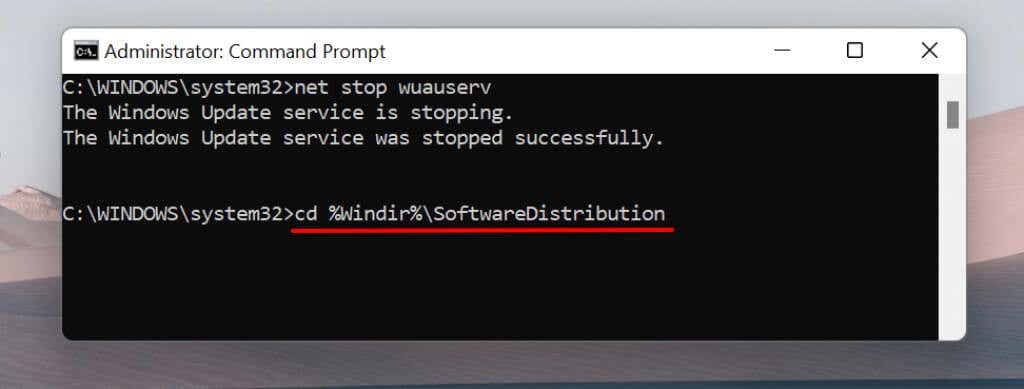
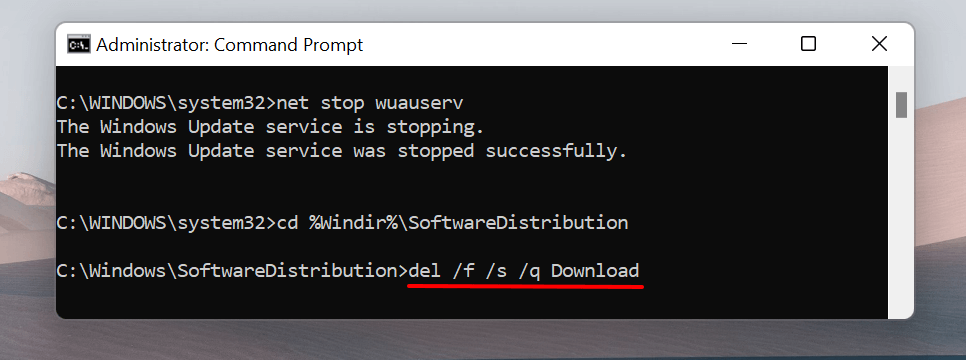
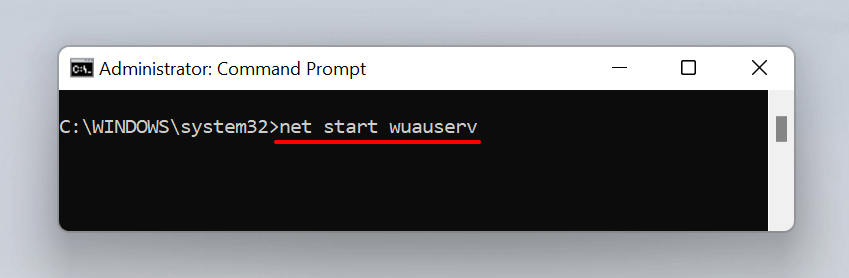
Delete Windows Updates Files Using Command Prompt
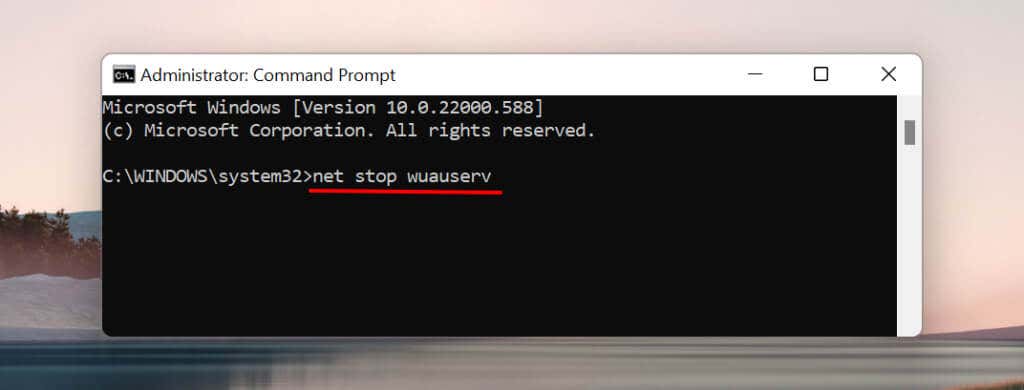
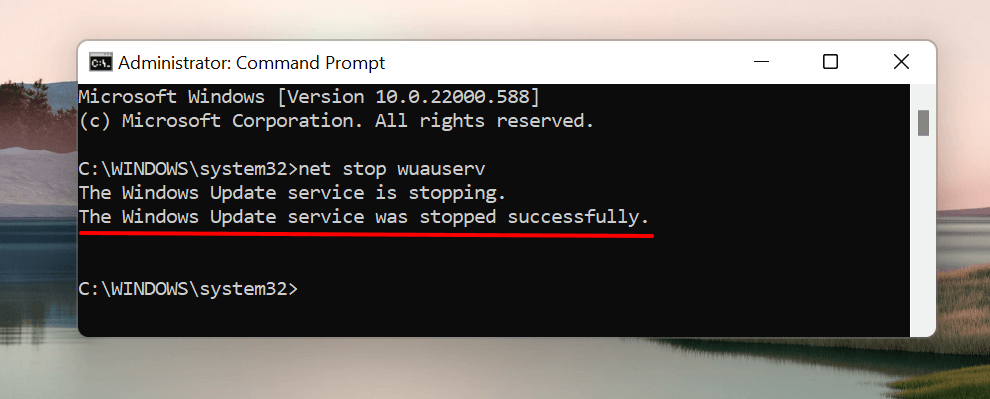
This method entails using Command Prompt to delete Windows Update cache files in your PC’s Software Distribution folder. This command instructs Windows to stop the Windows Update service. Proceed to the next step when Command Prompt displays a “The WIndows Updater service was stopped successfully” message. Command Prompt deletes the content of the Download folder in the assigned directory (i.e., SoftwareDistribution). The process might take a couple of minutes, depending on the size of the Windows Update files. Proceed to the next section when you get a success message.
Spoiled For Choice
My favorite thing about Windows is that there’s almost always more than one approach to executing an action. The four methods listed above will remove all downloaded Windows Update files on your PC. We recommend that you reboot your computer after deleting the files.